Shimming
Shimming
In the gearbox there are 3 gears: The "Spur gear" is the one driving the piston back. The "Sector gear" is the middle. And the "Bevel gear" is the motor engagement gear. On the motor itself is gear 4 the "Pinion gear". The purpose of these gears is to drive power from the motor to the piston. There by making the gun shoot. But to do this the gears need to be shimmed (The process of positioning the gears in relation to each other’s).
Warning
Shimming a gearbox takes training. It's NOT an easy job for a new player. But then again one time will always be the first. But bad shimming can mess up your gun! So make sure you practice on some cheaper guns before opening your expensive super gun! And please don't blame me if you mess it up! In this guide I try to pass on my knowledge, but that don't mean that you can do it also.
The Shims
When shimming you need a bunch of .1 mm shims and a bunch of .05 mm shims. These are the ones you use to position the gears. The .1 mm shims are the ones you use to give a rough placement, and then you can place a single .05 mm on each side to give precision placement ( If you are new to shimming just stick with the .1 mm shims! And remember: A to loos shim job is better than a too tight one! )
General
With all of the gears below there are some general rules that apply: Firstly NOT lock the gears in place! All gears need to be able to move allitle. If you do a too tight shim job the motor can't turn the gears! Second rule is to ALWAYS give the gears the biggest engagement area possible! If the gears are offset to much, it can twist and snap of teeth! And last but not least make it so tight that the gears don't move out of alignment. But the most important thing: Play around with it until you have ALL gears shimmed perfectly! All gears spinning around freely without rattling around.
Bevel
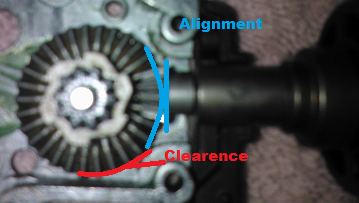
The first thing you need to do is shim the Bevel gear in relation to the Pinion gear. Here we want the pinion gear to sit right on the edge on the bevel gear. And when in this position the bevel gear should NOT push up on the motor! But at the same time it should NOT be so loos that the pinion can slip. So a tight fit with NO tension! When the gearbox is closed the Bevel gear should be able to move! Not allot but remember this gear flies around at thousands of rpm's so any tension will give allot of stress on the motor. A small finger tip: Shim to where the gear can barely move and then remove a .15 mm shims.

Spur
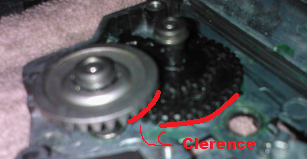
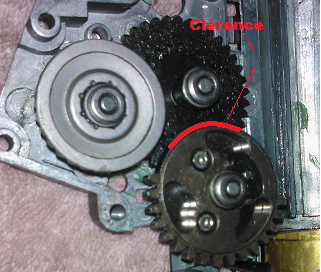
Then you should shim the Spur gear next. What you want with this gear is 2 things: 1: A good engagement area to the Sector gear. 2: A good engagement area to the Bevel gear. That's it! And of cause you don't want it to tight so the gear will add friction. Finger tip: Shim to where the gear can barely move and the remove a .5 mm shim. With both this and the bevel gear make sure that they are positioned in the box so that they don't scrape the edges on the box. And also make sure that the spur gear has clearance to the other parts of the bevel gear.

Sector
Last but not least shim the Sector gear. Here the key is the engagement area to the Spur gear, and to the piston. This gear takes the most (torque) stress, so it needs to be able to move. Not as much as the bevel gear but not as tight as the sector gear. Finger tip: Shim to where the gear can barely move and the remove a .1 mm shim. Also make sure that there is clearance to the spur gear.

Testing
When you thing you have shimmed the gears remember to TEST IT before putting in springs and pistons. Close up the gearbox with ALL the screws, and shake it a little, it should rattle a little but make sure the gears don't shake to much. Put your finger inside the gearbox and give the gears a spin. They should be able to continue spilling a couple of turns before stopping. If they stop without turning a full round by them self the shims on one of the gears are too tight! So all gears spinning with ease with only a little movement is what you are looking for.

